
为了实训,特别来写下这篇东西,供各位学习。
1.环境准备
- IDEA 和 JDK
- Tomcat
- MacOS 下参考这一篇东西 https://www.jianshu.com/p/db08d23049ce

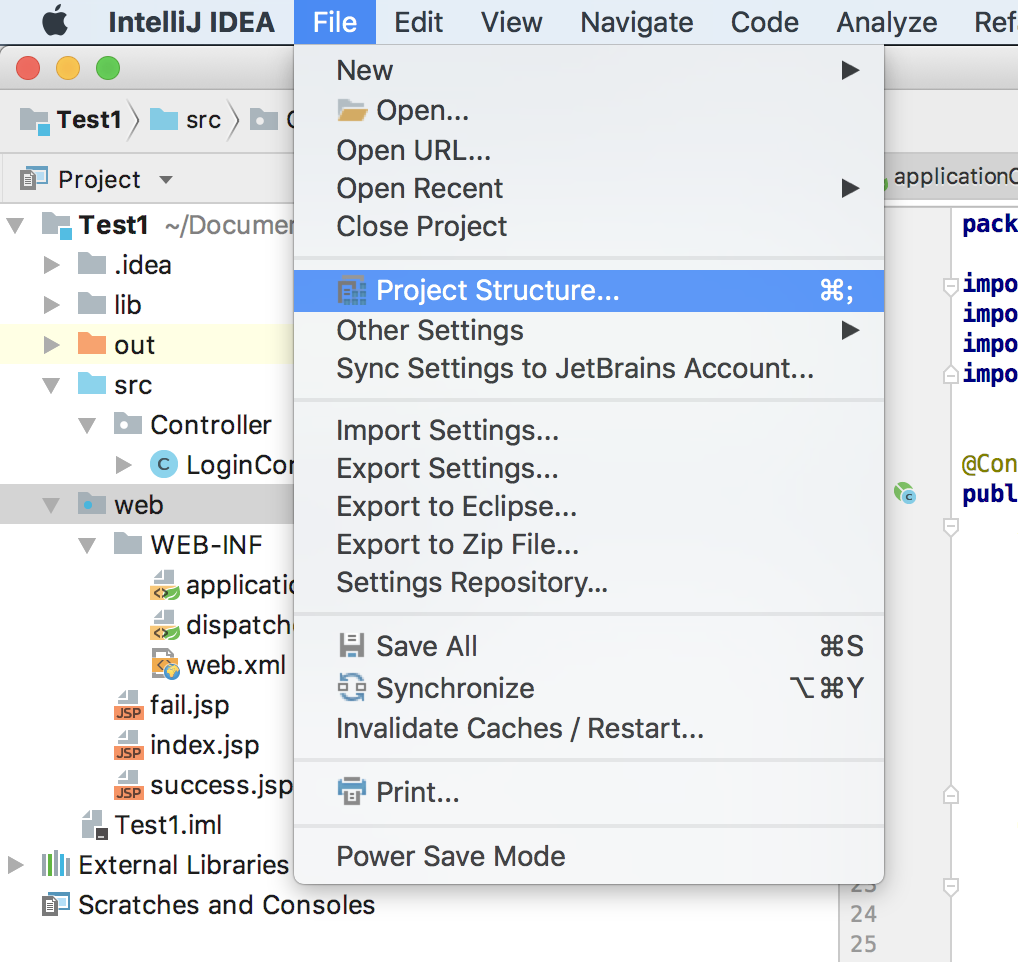
2.在 Idea 里创建一个项目。
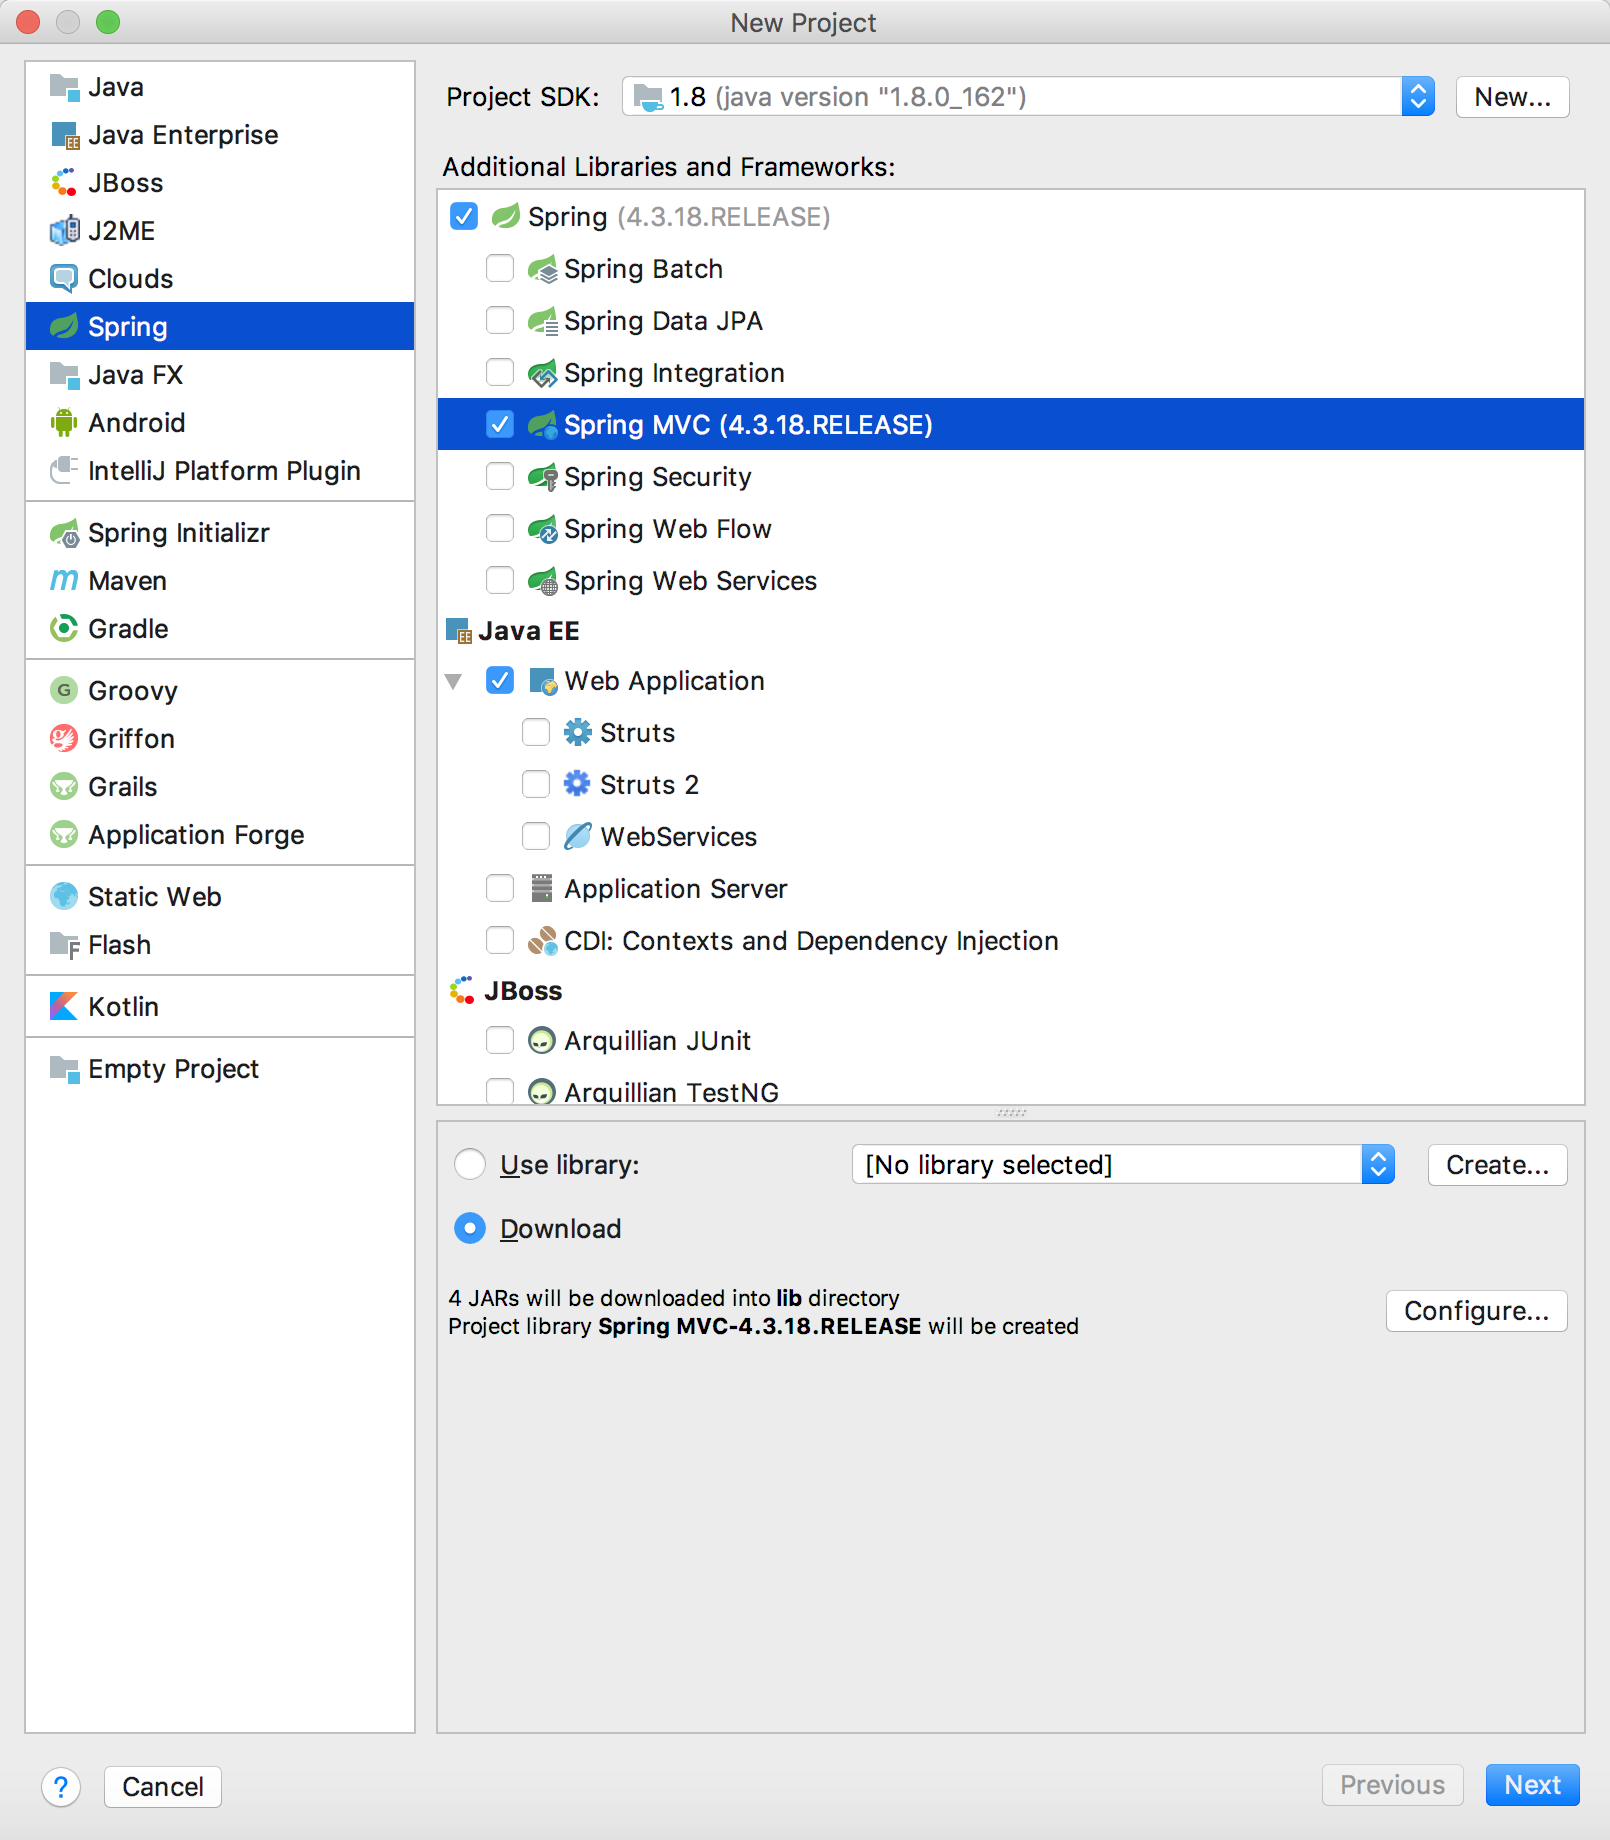
把 SpringMVC 的框框点上,下面选 Download, 然后点 Next.

输入工程名,点完成。

稍等一会儿。
2.然后你就得到了一个 Spring MVC 工程,文件结构如下。
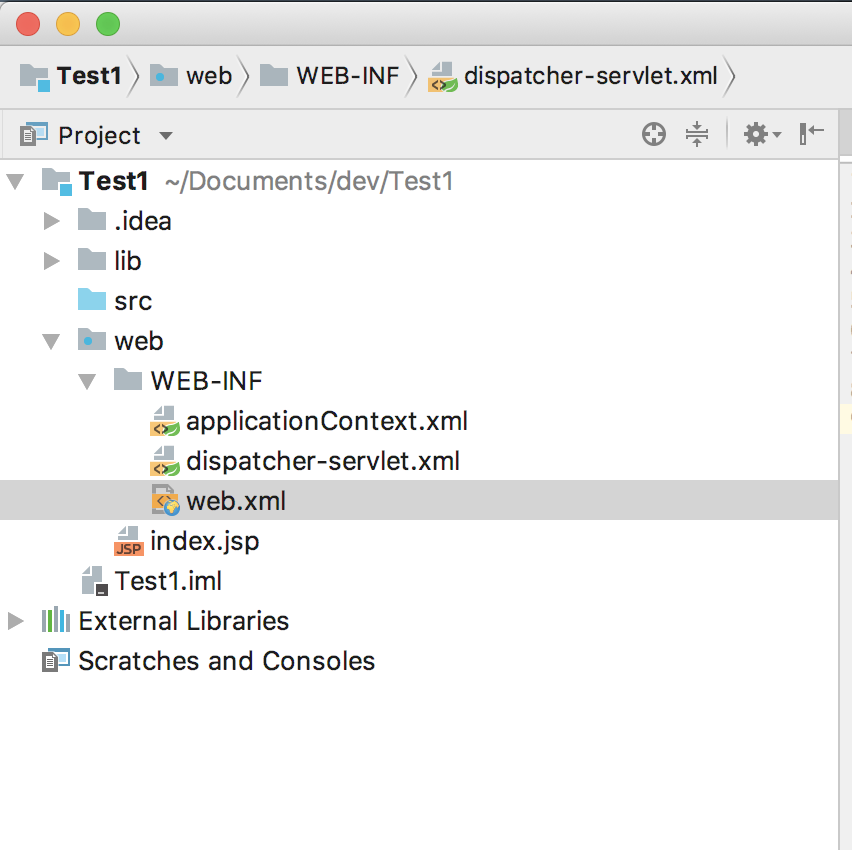
3.其中每个文件什么意思,自己上网搜搜吧,这里主要看看 dispatcher-servlet.xml 这个文件(dispatcher 的配置),我们将其修改为以下内容
<?xml version="1.0" encoding="UTF-8"?>
<beans xmlns="http://www.springframework.org/schema/beans"
       xmlns:xsi="http://www.w3.org/2001/XMLSchema-instance"
       xmlns:context="http://www.springframework.org/schema/context"
       xsi:schemaLocation="http://www.springframework.org/schema/beans http://www.springframework.org/schema/beans/spring-beans-4.0.xsd
            http://www.springframework.org/schema/context http://www.springframework.org/schema/context/spring-context-4.0.xsd
            http://www.springframework.org/schema/mvc http://www.springframework.org/schema/mvc/spring-mvc-4.0.xsd">

    <context:component-scan base-package="Controller"></context:component-scan>

</beans>
重点就是中间的
<context:component-scan base-package="Controller"></context:component-scan>
让框架自己去 Controller 这个包里搜吧。
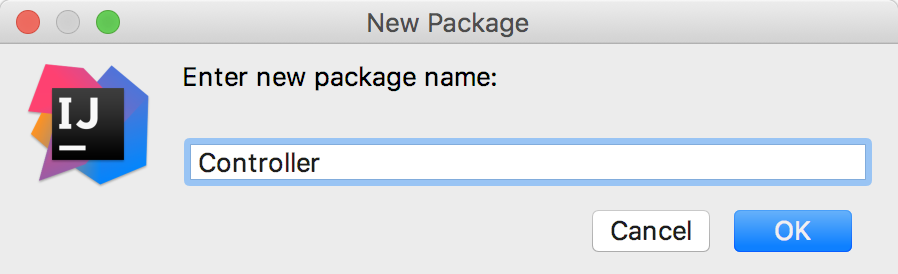
4.然后在这个包里添加一个 LoginController 类。
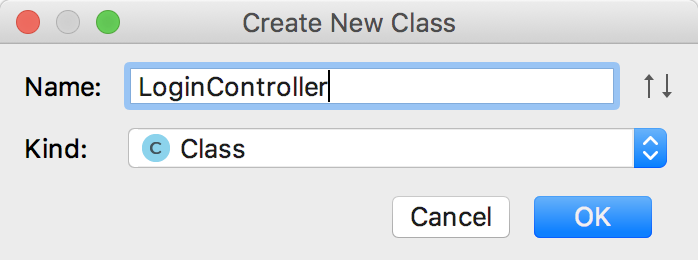
5.将 LoginController 的代码 改为如下的。
package Controller;
import org.springframework.stereotype.Controller;
import org.springframework.ui.Model;
import org.springframework.web.bind.annotation.RequestMapping;
import org.springframework.web.bind.annotation.RequestParam;
@Controller
public class LoginController {
/**
* @RequestParam注解的作用是:根据参数名从URL中取得参数值
* @param username
* 用户名,一定要对应着表单的name才行
* @param password
* 用户密码,也应该对应表单的数据项
* @param model
* 一个域对象,可用于存储数据值
* @return
*/
@RequestMapping(value = "/login", method = RequestMethod.POST) // @RequestMapping 注解可以用指定的URL路径访问本控制层,这里用 HTTP 动作来和下面区分
public String login(@RequestParam("username") String username, @RequestParam("password") String password,
Model model) {
//告诉页面该显示哪个用户名
model.addAttribute("username", username);
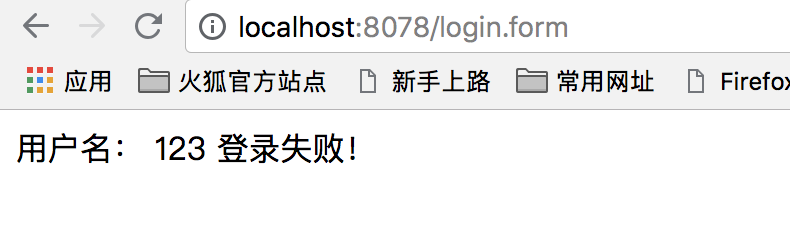
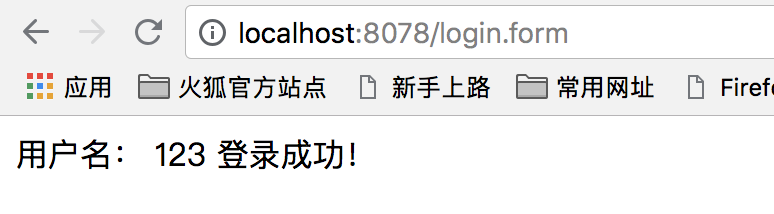
if(username.equals("123") && password.equals("123")) {
return "success.jsp";
} else {
return "fail.jsp";
}
}
}
6.然后我们在 web 目录下创建和修改文件,
index.jsp
<%@ page contentType="text/html;charset=UTF-8" language="java" %>
<!DOCTYPE>
<html>
<head>
<meta http-equiv="Content-Type" content="text/html; charset=UTF-8">
<title>登录</title>
</head>
<body>
<form action="/login.form" method="post">
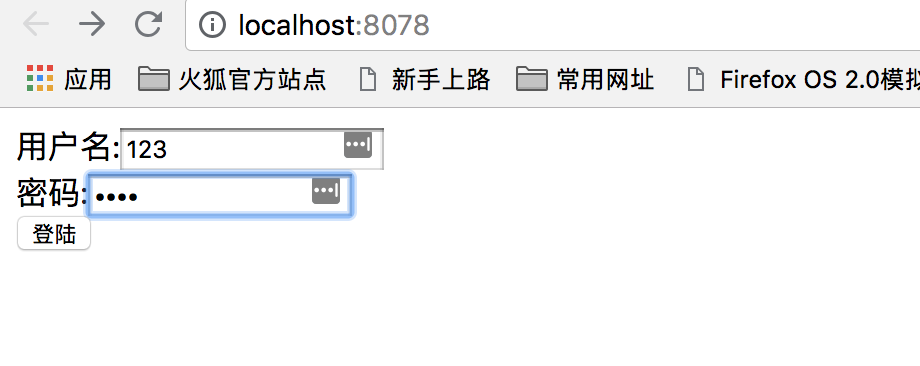
用户名:<input type="text" name="username"><br/>
密码:<input type="password" name="password"><br/>
<input type="submit" value="登陆">
</form>
</body>
</html>
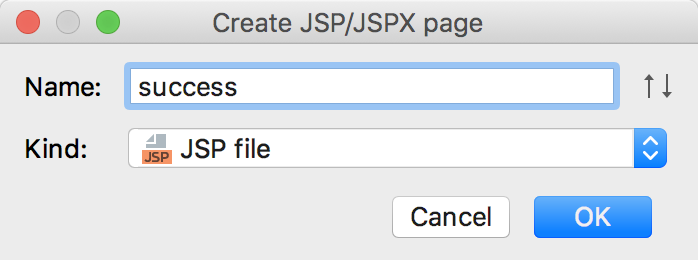
success.jsp
<%@ page contentType="text/html;charset=UTF-8" language="java" %>
<html>
<head>
    <title>成功</title>
</head>
<body>
    <p>
        <p>用户名: ${username} 登录成功!</p>
    </p>
</body>
</html>
fail.jsp
<%@ page contentType="text/html;charset=UTF-8" language="java" %>
<html>
<head>
    <title>失败</title>
</head>
<body>
<p>
<p>用户名: ${username} 登录失败!</p>
</p>
</body>
</html>
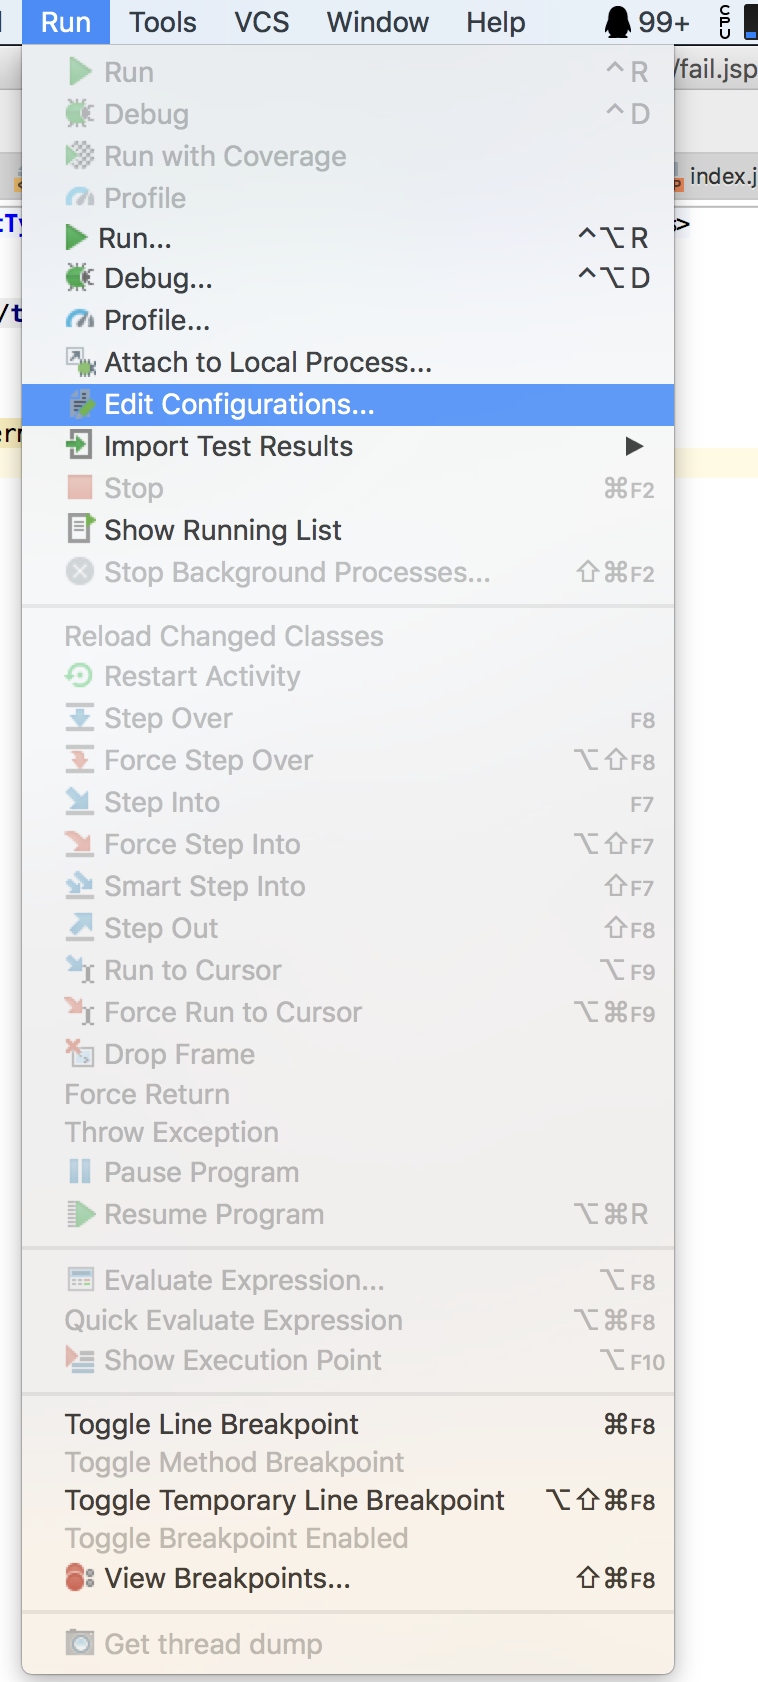
7.然后就该运行了。
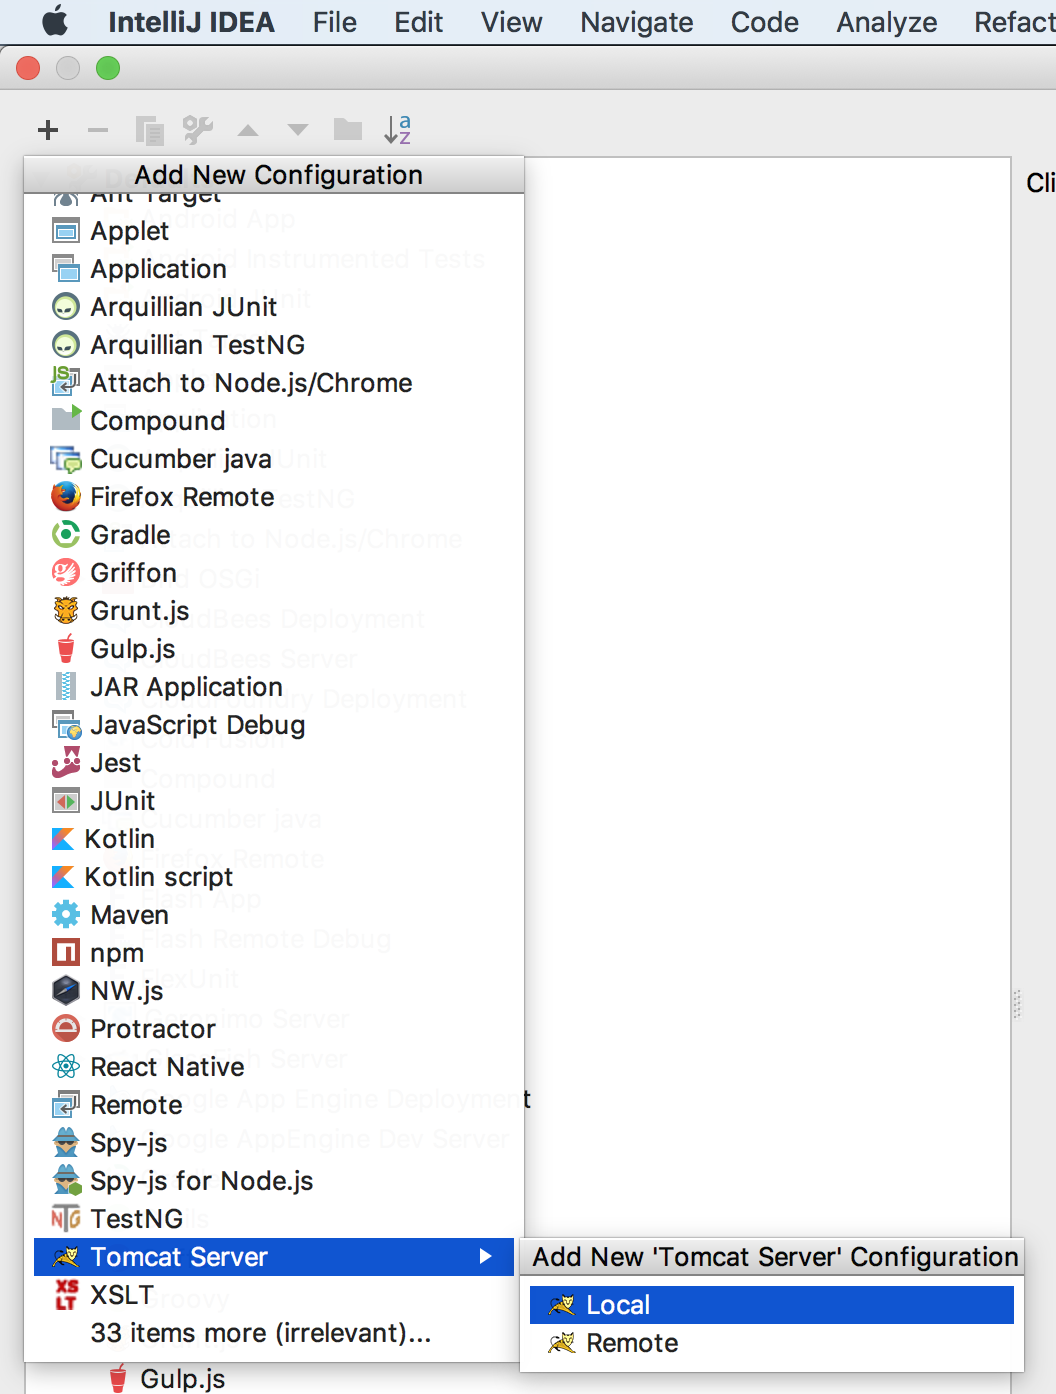
先编辑配置。
先在左边这个表里找到 Tomcat Server,选 Local,然后点右边的 Configure,然后把 上面的 Tomcat Home 和 Tomcat base directory 设置好。

点加号,选 Tomcat Server, Local
选你的 Tomcat,然后设置下 Http port
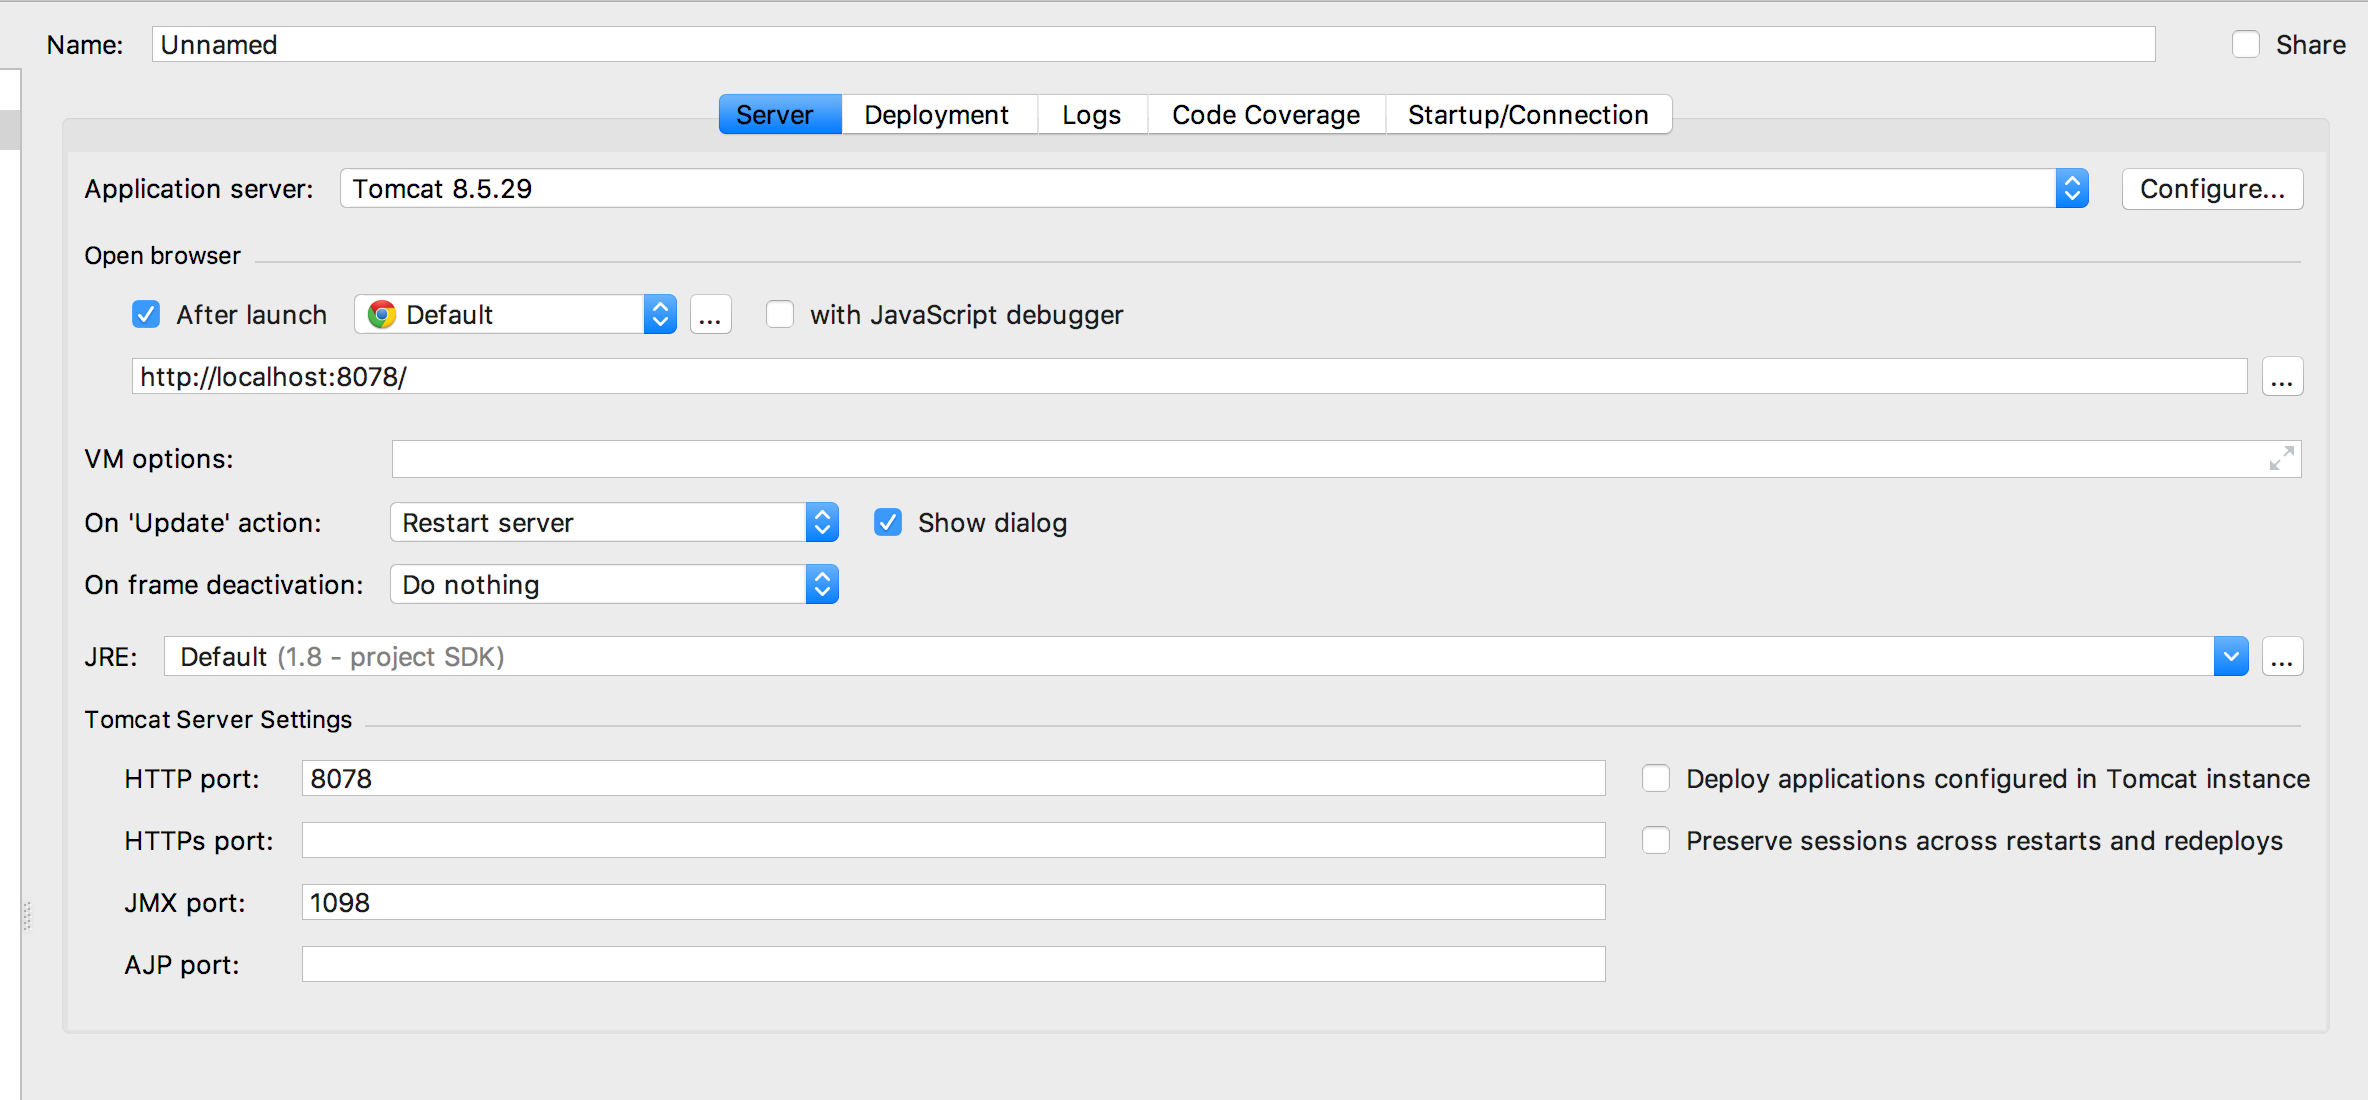
这是看到下面 有个警告,点下 Fix,然后直接点 OK,结束配置。

8.然后点击运行吧,这时候出现了下图的错误。

9.上网搜素得知是有些文件没放进打包里,这样解决。
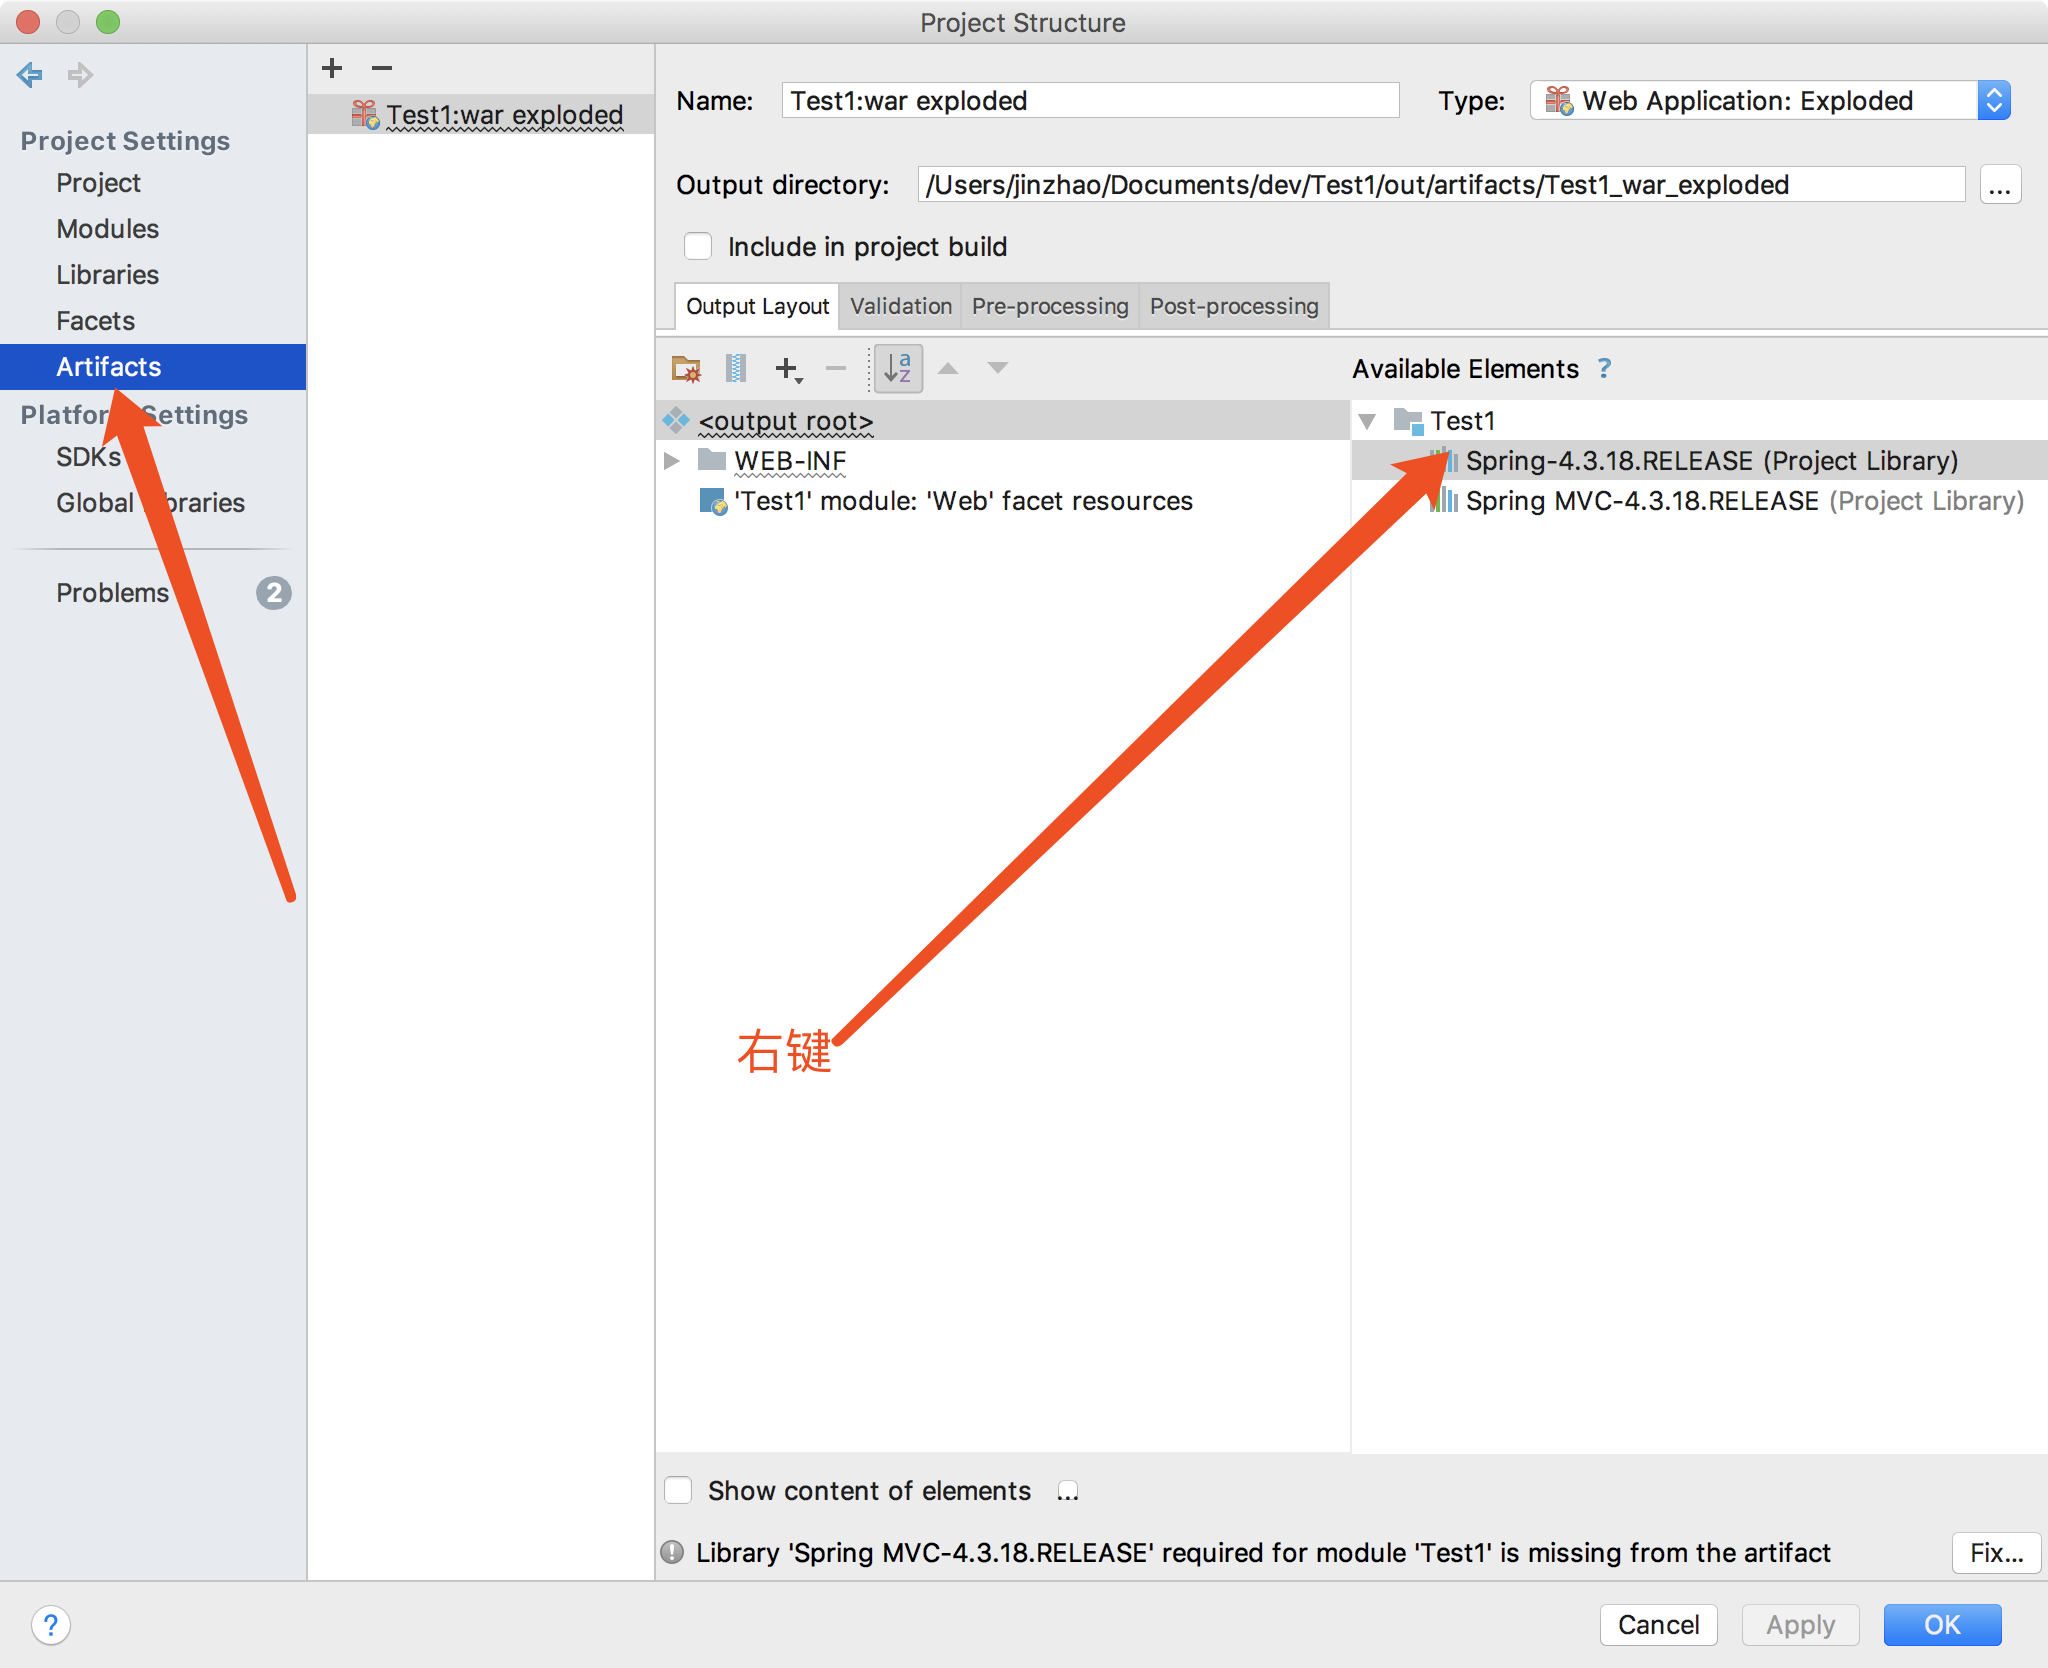
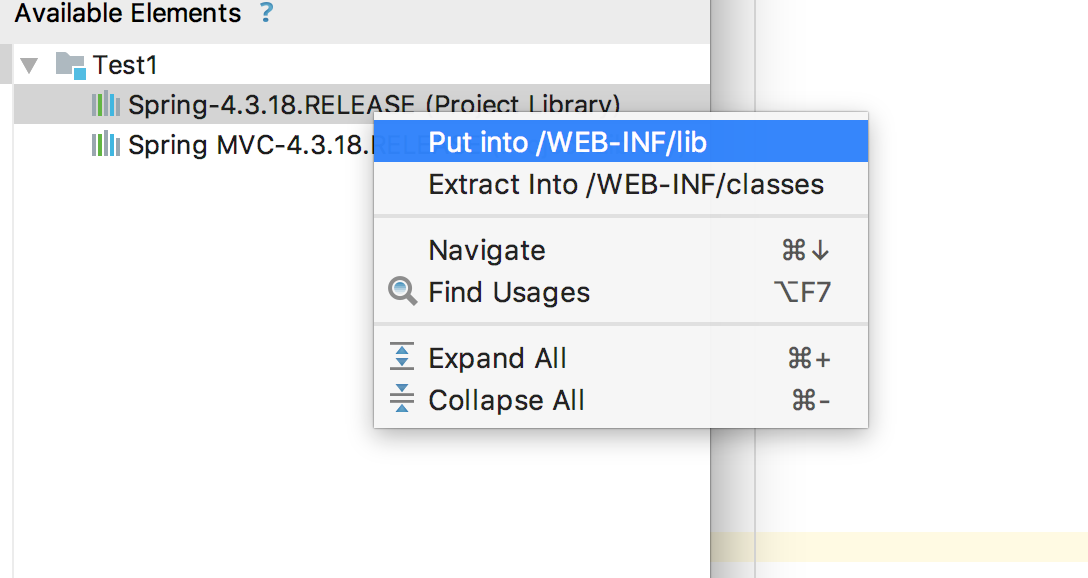
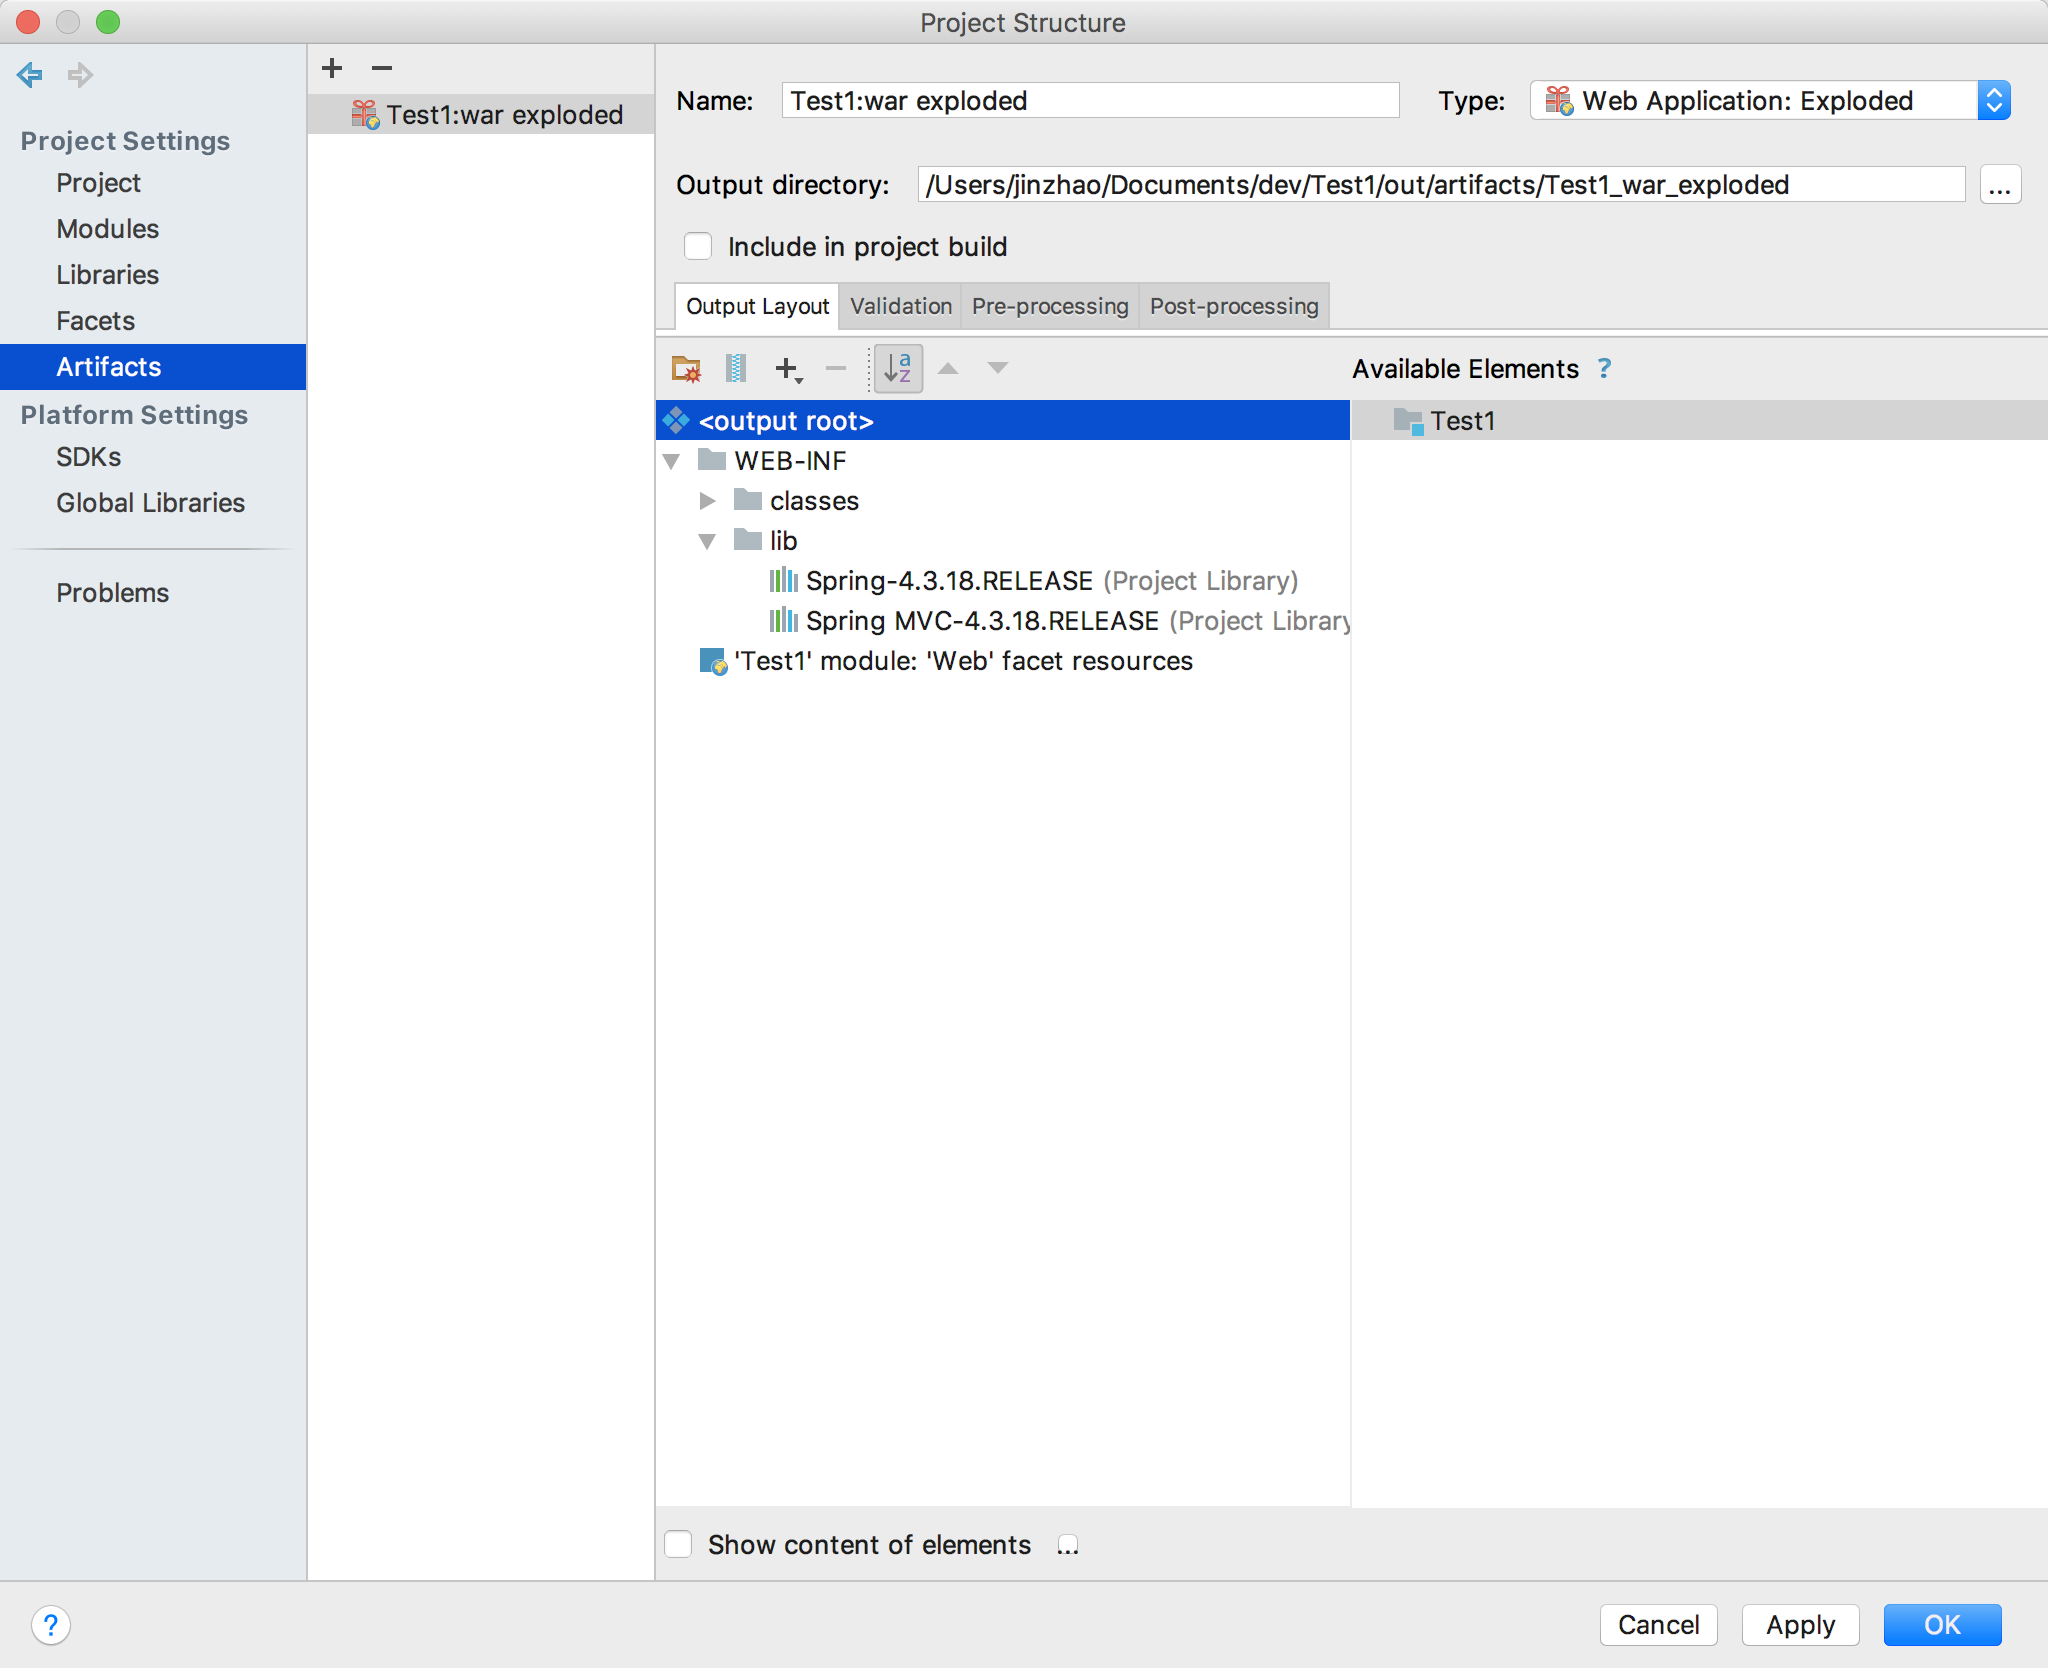
两个文件都要这样放进去。
最终放完是这样的。
10.OK,再来运行一遍。可以看到可以运行了。

11.打开 http://127.0.0.1:8078 就可以看到自己的页面了。
参考资料:
[1] https://blog.csdn.net/marksinoberg/article/details/51482079